Accounts
The Admin Customer File groups your customer accounts together to make it easier to manage shipments and invoicing. This option should be reserved for administration. For dispatch there is a limited options section available on the call taking page.
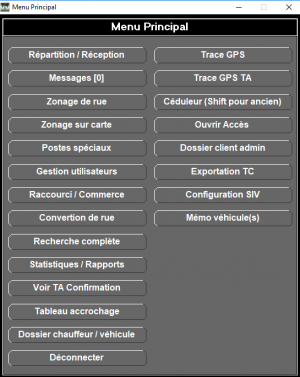
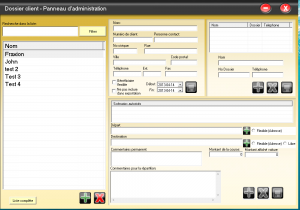
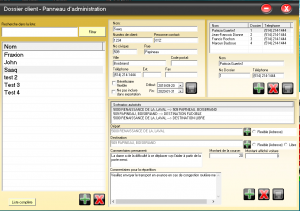
To access it, open Fraxion and from the main menu, select the option Admin Client File: Figure 1,2 and 3
As you can see, there are four sections and they are all important. You must enter all the information for the customer file to work. First, enter the name of your customers in the rectangle search in the list and click on the green + at the bottom of the page. Once the name of your client entered, complete the information in the second box and saved by clicking on the diskette icon.
The second box: for an individual customer, enter the customer's name, the customer's contract number, a contact person if needed, address and phone number. Enter the contract start and end date. If your client is an organization such as the SAAQ, social assistance, CSST or any other organization with several beneficiaries, you must enter the information differently.
Enter the name of the organization, the number of the organization, the contact person will generally be the agent of the organization. The address, phone, fax, extension of the organization. Enter the date of the opening of the file and a very distant end, because there will be several beneficiaries. The flexible beneficiary box should be checked only when you agree that users not mentioned in the contract can use the contract as a payment method. All users authorized to the contract will be listed in the next box (box 3). The box do not include in export simply means that when you do your export of files at the end of a given period those that you have checked this box will not appear in the complete list. We will come back to this later. Finish by saving the information by clicking on the diskette icon.
The third box. When you have only one customer in the contract, you must still complete this box. For contracts with multiple users you must enter each person authorized to the contract. To add click + green and to save click the diskette icon. If you want to remove a user from the contract do it X red.
The fourth box: Allowed scenarios. When you click on the green + you can add a starting or destination address. When you enter specific addresses, these scenarios will be fixed. You can check flexible to choose an address in the allowed scenarios or you enter. Example: You always start from home, but your destination flexible among several addresses on file. Vice versa. The free box says, the customer can go anywhere as destination address. You can add permanent comments such as the beneficiary is blind or needs help walking. These comments will always be permanent on file unless you delete them yourself. You can also add a comment for dispatch. Example: Make sure transportation is not late. Credit file, but with counter.
When the races have a predetermined amount, you can enter it in the race amount box. When the races are metered.
Please save the information between each step by clicking on the diskette icon.
When invoicing, click on "complete list" and enter the billing period. You can select one or more clients. In this table, the scroll bar allows you to access the following information: Date, time, customer number, company, customer name, departure address, destination address, internal notes, driver's name, pocket number, car number, taximeter amount, tip, if he made a no-Load or a blank, a remark and finally the customer's file number. This is where you will see all the transports made during the selected period. If you select do not include in the export the selected customer or customers will no longer be visible. To download the document in Excel format, click on "export" and it will be saved in your download file.
In order to see the part that is in the section click on the following link:


